
Some motivation for writing GIS-based Python scripts is to automate the execution of the geoprocessing tools found in the Python script. A number of options for process automation exists these days. One option that has been around for a number of years is creating a batch (.BAT) file and simply run the .BAT file from a Windows command line. Another option is using the Windows Task Scheduler to accomplish full-automation of running the Python script.
In Python 2.x this was not too much of a problem. With Pro and Python 3.x, some caution is warranted, since there seem to be some pending issues, bugs, etc related to Pro, Python 3.x, and Windows Task Scheduler.
See the Chapter 12 folder in the Chapter10_12ScriptsandData.zip file to see the scripts and .BAT files used in the script automation references below. The Commandline_clip_batchfile_Pro.bat file is used for the Batch File and Task Scheduler. This .BAT file references the CommandLine_Clip_v3.py (Python 3.x) script.
Requirements
Automating Python scripts is often performed on servers, not one’s laptop or desktop machine, hence why I discuss script automation as a final chapter (Ch 12) in the Python Primer workbooks. Often there needs to be some coordination with other GIS or IT staff within an organization and one certainly wants to test these automated processes on test server environments “just in case” of other technical or task scheduling issues.
The Batch File
Before scheduling a Windows Task, a batch file (.BAT) needs to be created. BAT files are often created in a notepad application and saved with the .BAT extension. NOTE: .BAT files are considered executable files by the Windows operating system, so be careful when constructing these. This .BAT file is “run” (executed) by double clicking on it within Windows Explorer. If you want to call this “automation,” fine.
Essentially, the .BAT file contains the syntax to automatically start Python and then “run the desired script” by adding the actual Python script file and any required parameters the script actually needs.
Here is an example of a .BAT file that contains the Python execution routine, the Python file to be “run,” and the required parameters for the specific script (i.e. command_line_clip_v3.py).
REM This is a Python batch script file
@echo Run the Command line python script

call "%PROGRAMFILES%\ArcGIS\Pro\bin\Python\Scripts\propy" commandline_clip_v3.py c:\\pythonprimer\\chapter12\\data city_facilities.shp central_city_commplan.shp c:\\pythonprimer\\chapter12\\mydata out_clip.shp

@echo Finished
- The REM line is a Windows DOS comment
- @echo is a Windows command to show a message on the command prompt
- call runs the Python (in this case Python 3.x) executable which is indicated as
- “%PROGRAMFILES%\ArcGIS\Pro\bin\Python\Scripts\propy” – propy is actually a batch file to start the Python 3 executable (see the ESRI documentation and for stand alone scripts).
- commandline_clip_v3.py is the Python script that contains the Python script code to run (in this case the Clip routine)
The next 5 sets of text are the arguments that are needed within the commandline_clip_v3.py script.
- c:\\pythonprimer\\chapter12\\data – input workspace
- city_facilities.shp – point feature class to be clipped
- central_city_commplan.shp – polygon feature class to clip city_facilities.shp
- c:\\pythonprimer\\chapter12\\mydata – output path for output data and the log text file that will store print messages
- out_clip.shp – the output clip point feature class
Once the .BAT file is created, this file can simply be “double clicked” in Windows Explorer and the script will “automatically” run, create the output and a log file with print messages.

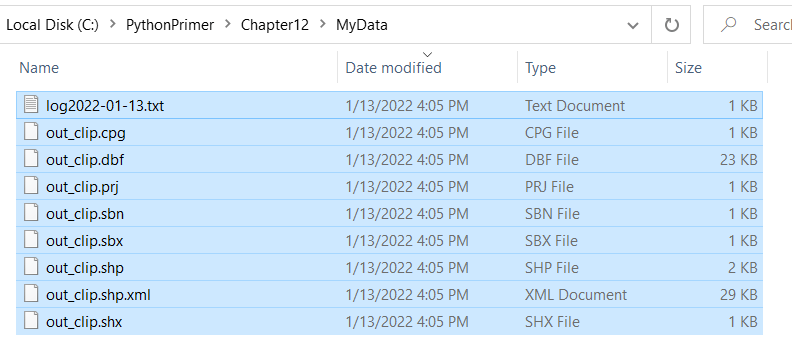
The resulting clipped shapefile and text file are shown in the “myData” folder (note: one of the parameters above).
Full Automation
NOTE: This example shows the commandline_clip_v3.py script set up on a local Windows laptop machine. This isn’t the normal operation of scheduling scripts (of any kind) for an organization. This process was successful, but those interested should test these processes on their own “test” server environment and consult with other GIS and/or IT staff as needed to make sure these processes run.
So, using the .BAT file above, one key modification needed to be made. Add in the full path to the actual Python script file (.PY), otherwise, the Task Scheduler can’t find the actual Python file. When testing this process a command line window popped up and flashed an error message that indicated the Python script file could not be found. From past experience, I knew to add in the full path to the Python script file and try again….in this case, success!
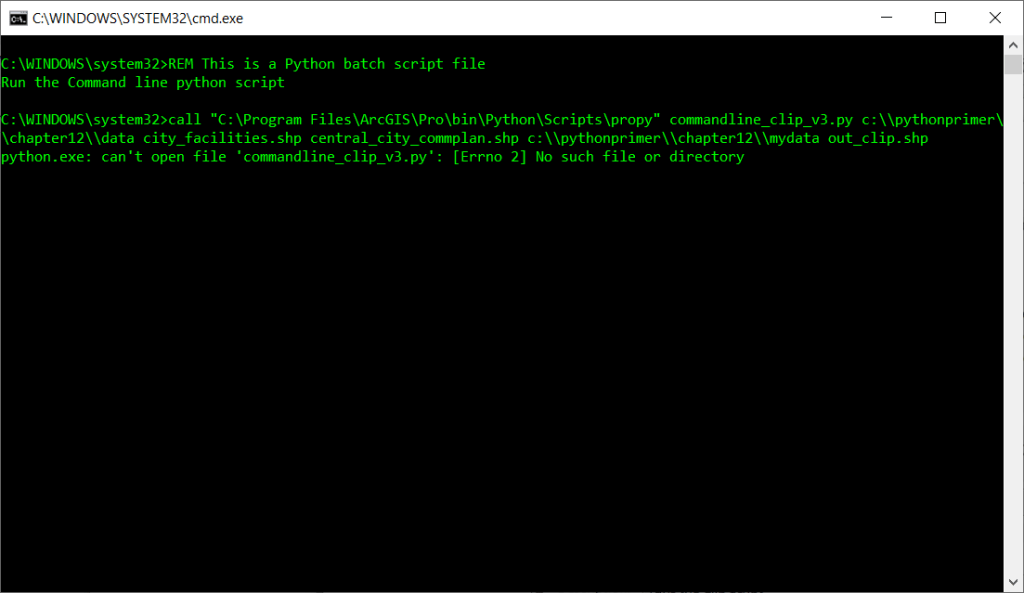
The modified .BAT file look like this. NOTE: the addition of the full path to the commandline_clip_v3.py script file.
REM This is a Python batch script file
@echo Run the Command line python script

call "%PROGRAMFILES%\ArcGIS\Pro\bin\Python\Scripts\propy" c:\\pythonprimer\\chapter12\\commandline_clip_v3.py c:\\pythonprimer\\chapter12\\data city_facilities.shp central_city_commplan.shp c:\\pythonprimer\\chapter12\\mydata out_clip.shp

@echo Finished
Set up the Task Scheduler
The Windows Task Scheduler starts by typing in Task Scheduler to the Windows Search box or use the Window start menu–Windows Administrative Tasks–Task Scheduler. The Task Scheduler appears.

Create Task
Click on the Create Task option on the right side or choose Create Task from the Action menu item.
General Tab
In the General tab, provide a name and a brief description for the task. The default is Run only when user is logged in. Again, for server configuration, other GIS or IT staff may need consulting.

Triggers Tab
The Triggers tab is where the date, time, and schedule frequency is set up. Set the start date and time and any other frequencies, etc. NOTE: When testing the scheduler, choosing One Time and a time a few minutes into the future can be set up. Once the Scheduler runs successfully and produces the desired output and logged messages, then the date and time settings can be changed as needed.

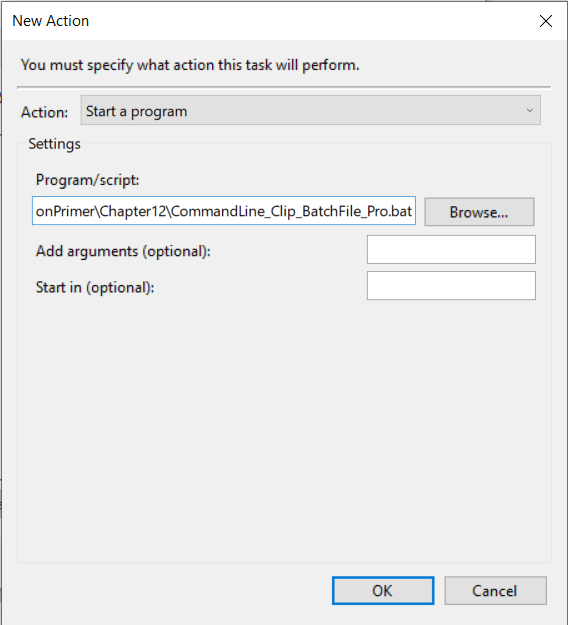
Actions Tab
The Actions tab is where the batch file is set. Browse for the appropriate .BAT file that will run the Python script. Keep in mind there may be additional arguments that are required for the script. Make sure to configure and test the .BAT file outside of the Task Scheduler, first to make sure the expected results are provided.
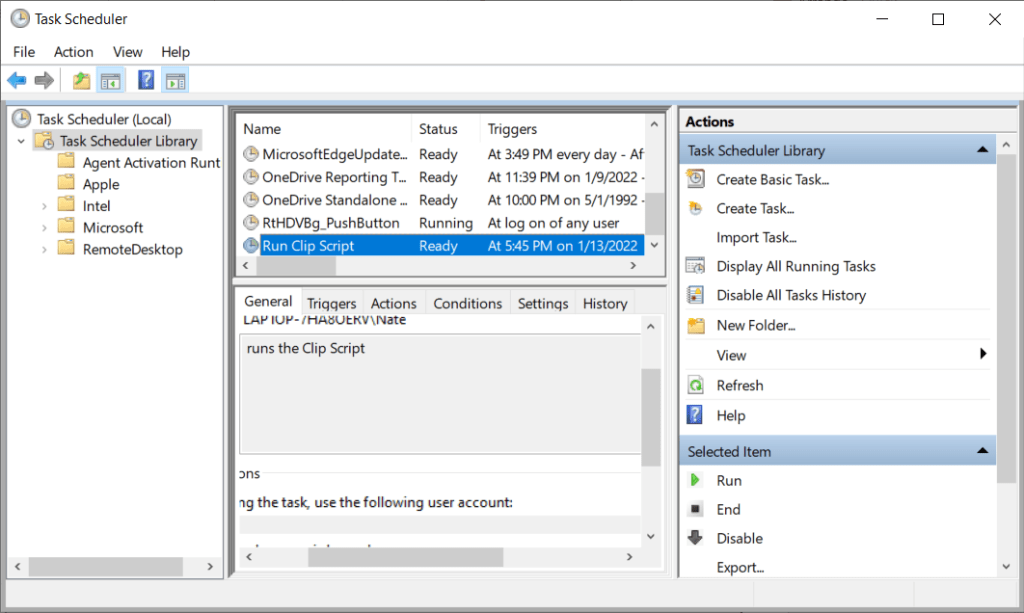
No other tabs need to be set up. The image below shows the new task in the scheduler.
This message below was a screen shot I did while the scheduled script ran. Notice the messages going to screen. These are also written out to the log text file with the date stamp.

The process successfully ran and the text file contained the correct print messages. This confirmation!

